
However what I have always found to be even more important and worthwhile about gallery visits is the way it inspires, moves and motivates your students.
I will never forget how passionately one of my students talked about an artwork she has seen on a visit to the Tate Modern Gallery in London. The piece was called "Forget Me" (2005) by Juliao Sarmento;
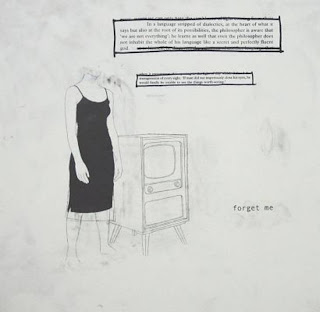
The student in question had never shown any particular flair in her artwork or in her interest of other artists but when I spoke to her for the first time after the visit she straight away expressed the sadness she had felt from the piece. It had really moved her and the memory of the piece stayed with her for quite some time afterwards. This is the powerful effect that gallery visits can have on students; they can appreciate the real depth that art can have and the emotional effect it can have on them, compared with the usual important, but often quite shallow appreciation of a pretty picture.
Coming up with activities for students to do during their time spent in a gallery can be challenging. The first and most obvious activity that comes to mind is to get pupils to find a painting or artwork that they are particularly drawn to and to draw a picture of it. You have to question the actual benefit to the student of completing a task like this. I am not saying it is totally pointless, it helps pupils to improve their observational drawing skills, and there is certainly much to be gained from encouraging students to spent an extended amount of time looking at a piece of artwork. But there is so much more that students can do in a gallery to enrich their experience of first hand observation of art than simply drawing a picture of it.
Obviously the range and depth of activities that your provide for a group varies depending on the age of the students you are with a what course they are studying. Therefore I have provided activities for students ranging from primary, to Key Stage Three. I will write more activities for GCSE and A Level in another post.
As a teacher you first need to think carefully about what you want your students to achieve from a visit. You much ask yourself a series of questions in order for them to come away from the exhibition with something of value:
1. What do you want your students to spend their time doing? - Looking at as much artwork as possible, focus on looking at one piece of artwork, discussing an artwork, drawing, thinking, writing?
2. What do you want them to come away from the gallery with? - notes, drawings, ideas, analysis, questions?
3. Do you want their time to be structured following a series of pre-determined activities, or do you want their time to be spent exploring at their own speed?
4. What do you want your student's focus to be? - Colour, shape, pattern, portraiture, texture, sculpture, cubism, abstract etc.
Once you have answered these questions you can start thinking about what activities you would like your students to partake in during their visit. Here are some ideas for each year group:
Primary - Focus on a simple theme, for example colour, shape, people, plants, animals, older year groups could be a little more abstract and focus on themes such emotions like happy and sad, hot or old colours etc.
Idea 1: Colour - Ask students to choose a colour, they must then look around the gallery for artwork that has a lot of that particular colour in it, for example red. They can think of words to describe the shades of red that they see such as angry, fiery, rosy, they can then come up with objects that relate to these colours and draw them from their imagination or from images they can find in the gallery, such as a rose, a fire, a red traffic light, a flag. Students will learn to look carefully at colour, be able to compare and contrast shades and tones, and develop their imaginative skills, they are also using literacy skills.
Idea 2: Texture - Students look around the gallery and find sculptures/paintings that have a lot of texture. They should try to find as many different textures as possible and think of a word to describe each one, for example: shiny, rough, smooth, bumpy, bobbly, slippy etc. Go outside the gallery and spend some time looking for textures that match the words they have come up with. Using a wax crayon they can create a rubbing of each surface texture. When they get back to school, these rubbings could be used to create a larger artwork, or be torn/cut up and collaged with, they could be labelled as a texture resource, the possibilities are endless. Students are learning to look carefully at the surface of artworks and it will encourage them to look closely, enabling them to gain an understanding of the processes involved in making the artwork.
Idea 3: Link to a current project - Use the gallery trip to enhance another project that is being worked on, this could be a history topic, a science investigation or perhaps a play that they are putting on. This is great to create cross curricular links. Students could focus on perhaps one particular painting that tells the story of a historical event, a myth or legend or a Bible story. They could then look at another painting which represents a story that they don't know and come up with their own story to match with the painting. Imagining what an artwork is about (and deliberately not reading the information to them) really helps students to look at the art for an extended period of time and to use their imagination.
Idea 4: Details: This activity requires a bit of research on behalf of the teacher prior to the visit. Create a sort of treasury hunt of items in paintings that they need to find, they could have a check list that they can tick off, when they have found each thing they can then come up with several other things in the painting that they have noticed and they can swap their list with a partner and get their partner to find the things they have themselves listed. Again this activity is about looking at the paintings, but means they get to look at a lot of different ones, and can even be directed so pupils look more at certain paintings than others.
Key Stage Three - Usually when I do a KS3 Art gallery visit, I relate the activities to the projects they are already doing such as portraiture, perspective or Identity. Here are some ideas for activities that relate to these themes:
Portraiture: Find as many artworks that include faces, working in pairs, write down the names of the artwork and the artists (they can look up more on the internet when they return). Ask students to choose their three favourites and discuss the different colours used, whether it is a realistic representation or not, the different shapes they can see in the portrait, the feeling they get from it, how they think it was made etc. (They could have a question sheet to answer these questions,) Next students work with their partner drawing a portrait of them in the style of one of the artworks they have looked at. Students will improve their ability to observe the artwork as well as team work but working with a partner. But drawing in the style of an artist they are taking their own artistic interpretation one step further than simply completing a copy of their favourite picture.
Perspective: As well as looking at actual artwork one opportunity in visiting an art gallery is to look at the gallery itself, before the visit ensure students are aware of what one point and two point perspective are, let them practice drawing it. ask students to position themselves in a location in the gallery where they can observe a good example of one point perspective i.e. at the end of a gallery. They can complete an observational drawing of the space that shows one point perspective and another from two point perspective. To add to this task students can also observe any paintings in the gallery that include one point or two point perspective, they can answer questions about the paintings using a "form, process, content, mood" proforma. Students will improve their observational drawing skills and working knowledge of one point and two point perspective.
Identity: It is important if you can doing a project on identity with a gallery visit that you have discussed with students the meaning of identity and how it can be portrayed in art. In the gallery students should look at the exhibitions and find artwork that shows (a) the identity of the artist, (b) reflects their own identity, (c) shows the identity of the person in the artwork. For example they might be able to look at a Freida Kahlo, Van Gogh etc. Students can then think about identifying exactly what it is in the paintings that reflect identity, and this can develop onto a project about their own identity.
What projects and activities have you done with students in art galleries?


